

This step-by-step guide will help you remove stains caused by travel-sized hand cream. It provides simple and effective steps to tackle stains on clothes, upholstery, and other surfaces, leaving your items looking good as new.
Top Picks for On-the-Go Moisture!


Swap to Clean Living- Say goodbye to toxins!
Identify the stained material
To identify the stained material, start by closely examining the stain. If the hand cream has dripped onto clothing, check the fabric type. For example, if it’s a delicate silk blouse, you need to handle it with care. Gently blot the stain using a clean cloth or paper towel to lift as much of the cream as possible. On the other hand, if the hand cream has soiled a carpet or upholstery, you’ll need to determine the material. To do this, check the manufacturer’s label or perform a quick online search if the information isn’t readily available. Once you know the material, you can proceed with the appropriate cleaning method for that specific surface.
For instance, if the stain is on a cotton shirt, create a solution of mild detergent and warm water. Apply the mixture to the stained area, gently rubbing the fabric together to work in the soap. Rinse thoroughly with water and repeat if necessary. If the stain is on a wool carpet, use a cleaning solution specially designed for wool fibers. Blot the stain with the solution, then rinse with water and blot dry. Remember, different materials require different treatments, so take the time to identify the stained material before taking any further steps.


Blot the stain
To successfully remove a hand cream stain from a material, start by identifying the stained area. Then, take a clean cloth or paper towel and gently blot the stain. Remember, avoid rubbing the stain as it can cause it to spread. Instead, apply light pressure and blot the affected area. This method will help remove any excess hand cream and prevent it from setting deeper into the material.
Pre-treat the stain
To effectively pre-treat a stain, follow these steps:
- Identify the stain: Determine the type of stain you are dealing with, as different stains may require different pre-treatment methods. Common types include food, grease, ink, or blood.
- Choose a pre-treatment product: Select a stain remover or a gentle detergent specifically designed for the type of stain you have. Read the instructions on the product to ensure compatibility with the fabric.
- Apply the pre-treatment product: Saturate the stain by applying the pre-treatment product directly to it. Use enough to thoroughly cover the entire stained area.
- Allow it to sit: Let the pre-treatment product sit on the stain for a few minutes to allow it to penetrate the fabric. This will help break down the stain and make it easier to remove.
- Gently agitate: After the recommended time, gently rub or blot the stained area with a clean cloth or sponge. Be careful not to scrub too vigorously, as this may damage the fabric.
- Wash as usual: Finally, wash the garment or material according to the care instructions. If the stain persists, repeat the pre-treatment process or consider seeking professional cleaning assistance.
Remember, pre-treating the stain before washing or further cleaning can significantly improve the chances of removing it successfully.
Wash or clean the material
To properly wash or clean different materials, it is important to consider their specific requirements. When it comes to clothing, always check the care label and follow the instructions provided. If the label says to hand wash, use a gentle detergent and lukewarm water, and be sure to rinse thoroughly. For machine washable items, separate colors and use the appropriate cycle and temperature setting. It’s also a good idea to turn clothes inside out to protect the fabric.
When it comes to upholstery or carpet, a regular vacuuming routine is essential to remove dirt and debris. For stains or deep cleaning, you may need to use a carpet cleaner. Follow the instructions on the cleaner, making sure to spot test in an inconspicuous area first. If you are unsure or dealing with more delicate or sensitive materials, it is best to consult a professional cleaner or follow the manufacturer’s specific instructions.
Remember, different materials require different care, so always take the time to check labels and guidelines to ensure you are using the correct cleaning method.
Check for residual stains
After washing or cleaning the material, it’s crucial to inspect it for any residual stains. To ensure complete stain removal, follow these simple steps:
- Inspect the Material: Carefully examine the cleaned area to identify any remaining stains. Look for discoloration, spots, or any traces of the previous stain.
- Repeat Pre-Treatment and Cleaning: If you notice any residual stains, don’t worry! Repeat the pre-treatment and cleaning process to tackle the remaining marks. Apply the pre-treatment solution specified for the type of stain you are dealing with, and gently work it into the affected area using a clean cloth or sponge.
- Thorough Rinse: After repeating the pre-treatment, thoroughly rinse the material under running water. Ensure that all traces of the pre-treatment solution and any loosened stain particles are completely removed.
- Inspect Again: Once you’ve completed the rinsing process, carefully inspect the material once more to check if the stain has vanished. If the stain is still visible, repeat the pre-treatment and cleaning steps until it is completely gone.
Remember, the key to successful stain removal is addressing the stain as soon as possible. By promptly identifying and treating stains, you increase the likelihood of complete removal and restore your material to its pristine condition.
Air dry or follow drying instructions
Once the stain has been successfully removed from your material, it is important to ensure proper drying to avoid any potential damage. If possible, allow the material to air dry naturally. Find a clean, flat surface and lay the material flat on it. Make sure to position it in such a way that all parts of the material are exposed to air. This will help facilitate the drying process and prevent any remaining moisture from causing further issues.
However, if the material has specific drying instructions provided, it is best to follow them. Check the care label or any accompanying information to see if machine drying is recommended. If so, place the material in the dryer according to the indicated settings, such as temperature and cycle length. This will ensure that the material dries efficiently and without any adverse effects.
Regardless of the drying method you choose, it is crucial to avoid exposing the material to direct heat or sunlight until it is completely dry. Direct heat sources like radiators or hair dryers can cause shrinkage or damage to certain fabrics. Similarly, prolonged exposure to sunlight can lead to fading or discoloration. Instead, find a well-ventilated area away from direct heat or sunlight and allow the material to dry naturally or through machine drying.
Remember, by following these simple drying instructions, you can ensure that your material dries properly without any risk of damage or further issues.
Evaluate the results
To evaluate the results and check if the stain has been effectively removed, follow these steps:
- Inspect the stained area closely: Take a good look at the treated spot to see if the stain has completely disappeared or if there are still remnants.
- Assess the effectiveness of the stain removal method: Consider the effectiveness of the method you used by comparing the before and after appearance of the stain.
- Test the area: If there are still remnants of the stain, perform a small test in an inconspicuous area using the same stain removal method or a different one to see if it yields better results.
- Seek professional help if needed: If the stain persists despite your efforts, it may be time to seek professional assistance. Professionals have the knowledge and specialized tools to tackle stubborn stains effectively.
Remember, patience and persistence are key when dealing with stubborn stains. Don’t be discouraged if the stain is still visible after your initial attempt. Keep trying different methods or consult with experts until you achieve the desired results.
Saying goodbye to stubborn stains
In conclusion, removing stains caused by travel-sized hand cream is a manageable task with the right approach. By taking prompt action, using effective cleaning techniques, and being thorough in your stain removal process, you can easily restore your belongings to their original condition. Don’t let those unsightly stains linger any longer – with a little effort, they will soon become a thing of the past!
Essential Supplies


Easy Stain Removal Methods
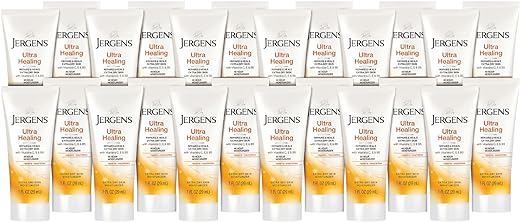
Getting the most out of your travel-sized hand cream
- Start by squeezing a small amount of the travel-sized hand cream onto the palm of your hand
- Rub your hands together, making sure to spread the cream evenly across both hands
- Pay special attention to your fingers, knuckles, and any dry areas on your hands
- Gently massage the cream into your skin, allowing it to absorb for a few minutes
- For best results, use the hand cream after washing your hands or whenever your hands feel dry throughout the day
All your questions answered about travel-sized hand cream
Are there any travel-sized hand creams that offer SPF protection?
Yes, there are indeed travel-sized hand creams available in the market that offer SPF protection. Many skincare brands have recognized the importance of sun protection for the hands and have formulated hand creams with added SPF. These travel-sized hand creams with SPF are designed to nourish and moisturize your hands while also providing protection against harmful UV rays. They come in convenient sizes that are perfect for carrying in your purse or during travel. It’s always a good idea to check the product labels or consult with a skincare professional to find the best option that suits your specific needs and preferences.
Does anyone have any advanced tips for removing stubborn hand cream stains? I’ve tried the basic steps, but the stain is still there.
I accidentally put the material in the dryer after washing it, and now the stain seems to have set. Any suggestions on how to salvage it?
Oh no! When a stain sets, it can be more challenging to remove. You could try using a stain remover or, if it’s safe for the material, a mixture of hydrogen peroxide and water. Apply the mixture to the stain, let it sit for a while, and then wash the material again. Hopefully, that will help lift the set stain.
I followed the guide exactly as described, but I’m still seeing a faint residual stain. Any recommendations for getting rid of it completely?
Sometimes stubborn stains require a little extra effort. You could try repeating the pre-treatment and washing steps, or using a stain remover specifically designed for the material you’re dealing with. Hopefully, that will help remove the residual stain.
I’ve heard that using dish soap as a pre-treatment for stains can work wonders. Has anyone tried this method?
I followed the guide and successfully removed the stain from my favorite blouse. Thank you so much for these helpful steps!
You’re welcome! I’m thrilled to hear that the guide helped you remove the stain from your blouse. It’s always rewarding to see positive results!
I always carry travel-sized hand cream with me, so these stain removal tips are a lifesaver. Does anyone have suggestions for specific hand creams that are less likely to cause stains?
Instead of washing the material right away after pre-treating the stain, I find that letting the pre-treatment sit for a while before washing gives better results. Anyone else do this?
That’s an interesting variation! Allowing the pre-treatment to sit for a while gives it more time to break down the stain. Thanks for sharing!
I always carry a small bottle of hand sanitizer with me while traveling. It works great as a pre-treatment for hand cream stains. Just apply a small amount to the stain, let it sit for a few minutes, and then wash the material as usual.
This guide is really helpful! I always struggle with removing stains from different materials, so being able to identify the stained material first will definitely make the process easier.
I tried blotting the stain with a paper towel and it worked like a charm! The stain started to fade away immediately. Thanks for the tip!
You’re welcome! I’m glad blotting the stain worked well for you. It’s a simple yet effective way to remove the hand cream stain.