Welcome to our step-by-step guide on how to pack a travel first aid kit! We understand that staying healthy and safe while traveling is a top priority for everyone. That’s why we have put together this guide to help you pack a comprehensive first aid kit that will be your trusted companion on your journeys.
In this guide, we will walk you through each step of the process, ensuring that you have all the necessary supplies to handle any minor injuries or illnesses that may arise while you’re on the go. From bandages and antiseptics to medications and essential tools, we’ve got you covered.
We know that packing can be overwhelming, especially when it comes to important items like a first aid kit. But don’t worry! Our friendly step-by-step instructions will make the process easy and stress-free. By following our guide, you can rest easy knowing that you are prepared for any unforeseen circumstances that may occur during your travels.
Whether you’re embarking on a short weekend getaway or a long-term adventure, having a well-stocked travel first aid kit is essential. So, let’s get started and ensure that you have all the essentials to keep you safe, healthy, and worry-free on your next journey!
Essential Medical Supplies for Adventurers


Essential Items for Your Travel First Aid Kit: What to Pack?
Gather the necessary supplies
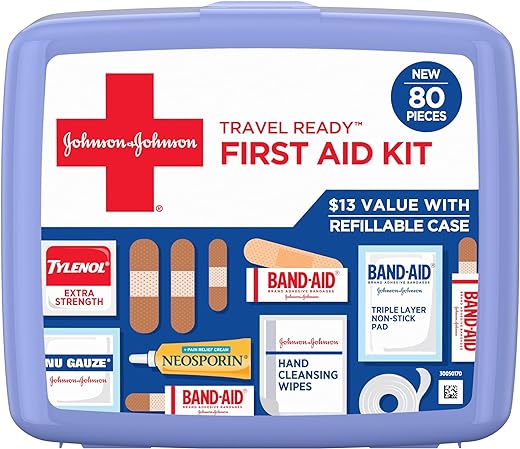
To gather the necessary supplies for any emergency situation, it is essential to create a list of important items. Start by including items like band-aids, gauze pads, adhesive tape, antiseptic wipes, and pain relievers. These are fundamental for treating minor injuries and preventing infections. For instance, having a variety of band-aid sizes can accommodate different wound sizes, while antiseptic wipes can effectively clean cuts and scrapes.
Additionally, include tools such as tweezers and scissors. Tweezers are useful for removing splinters or foreign objects from the skin, while scissors are handy for cutting gauze or tape to specific sizes. Remember to add any prescription medications that you or your family members may require. This ensures that you have an adequate supply on hand during an emergency.
By compiling a comprehensive list of these essential items, you can be well-prepared for various situations. Whether it’s treating a minor injury or managing a chronic condition, having these supplies readily available can make all the difference in providing immediate care.


Choose a suitable container
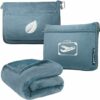
When selecting a container for your first aid supplies, it is important to choose one that is durable and waterproof. This will ensure that your supplies are well-protected and ready for use whenever you need them. Look for a small, portable case that has compartments or dividers. This will help you organize your supplies and make it easier to find what you need quickly. Remember to opt for a case that is easy to open and close, as you may need to access your supplies in emergency situations. By selecting a suitable container, you can ensure that your first aid supplies are organized, accessible, and well-protected.
Organize supplies by category
To organize your supplies by category, start by grouping similar items together. This will help create a systematic arrangement that allows for easy access when needed. Begin by gathering all of your supplies and sorting them into categories based on their function or purpose. For example, you can group band-aids and adhesive tape in one section, medications in another, and so on. Be sure to label each section accordingly, so you can quickly locate items when you need them. By following this simple step, you’ll have a well-organized supply area that saves you time and frustration in the long run. Happy organizing!
Pack essential medications
If you have any prescription medications, it is crucial to ensure that you have an adequate supply for the entire duration of your trip. To pack them properly, keep them in their original packaging with clear labels. This will help you avoid any confusion or mix-ups during your journey.
To begin, gather all your prescription medications and check the quantity you have. If you are running low, make sure to refill your prescriptions before you leave. Once you have enough supply, keep each medication in its original packaging. This includes the bottle or container it came in, as well as any additional packaging or inserts.
Make sure that the labels on the packaging are clear and visible. If necessary, use a marker to write down any additional information, such as dosage instructions or precautions. This will help you and others easily identify each medication and understand how to take it correctly.
When packing your medications, place them in a designated section of your bag or travel case. Keep them easily accessible so that you can quickly find what you need when it’s time to take your medication. Additionally, if you have any liquid medications or other special requirements, make sure to pack them securely to prevent any leaks or damage.
By following these simple steps, you can ensure that you have your essential medications with you during your trip. Keeping them in their original packaging with clear labels will help you stay organized and avoid any confusion. Remember, it’s always better to be prepared when it comes to your health and well-being while traveling.
Include personal medical information
To ensure your safety and well-being in case of an emergency, it is crucial to include a card with your personal medical information. This card should contain your emergency contact details, any allergies you have, and any existing medical conditions you may be dealing with. By having this card readily accessible, you can provide essential information to medical professionals or first responders when they need it the most.
To create your personal medical information card, follow these simple steps:
- Gather the necessary information: Start by collecting all the relevant details that need to be included on the card. This should include the name and phone number of your emergency contact, a list of any known allergies you have, and a brief summary of any existing medical conditions you may have.
- Format the card: Using a small index card or a piece of paper, create a clear and concise layout for your personal medical information. You can use bullet points or separate sections to organize the different pieces of information, making it easy to read and understand.
- Write the emergency contact information: Begin by clearly writing the name of your emergency contact. Include their relationship to you (e.g., spouse, parent, friend) and their phone number. It’s important to use a legible font or handwriting to ensure that the information can be easily read.
- List your allergies: Under a separate section, write down any allergies you have. Be specific and mention the allergen (e.g., peanuts, latex) as well as the type of reaction you may experience (e.g., severe itching, difficulty breathing).
- Mention existing medical conditions: In another section, briefly outline any existing medical conditions you may have. This can include chronic illnesses, heart conditions, diabetes, or any other relevant information. Keep it concise but provide enough detail to give medical professionals an understanding of your condition.
- Keep the card easily accessible: Once you have created your personal medical information card, store it in a place that is easily accessible. Consider keeping it in your wallet, purse, or attaching it to your ID card or keychain. Make sure to inform your family members, close friends, or caregivers about the card’s location.
By following these steps, you will have a personal medical information card that can be vital in an emergency situation. Remember to update the card regularly as your contact details or medical conditions may change over time. Stay proactive and prioritize your safety by having this important information readily available.
Check for expiration dates
Regularly review and replace expired items in your travel first aid kit. This ensures that all supplies are effective and safe to use. Start by gathering all the items from your first aid kit and checking their expiration dates. Look for the printed date on each item and make note of any that have expired or are close to expiring. Once you have identified these items, remove them from your kit. Next, create a list of the expired or soon-to-expire items that need to be replaced. Consult with a pharmacist or your healthcare provider to find suitable replacements for these items. Finally, restock your first aid kit with the new supplies, making sure to organize them properly and keep them easily accessible. By regularly reviewing and replacing expired items, you can ensure that your travel first aid kit is always stocked with safe and effective supplies.
Keep the kit easily accessible
Place the travel first aid kit in a location that is easily accessible, such as your carry-on bag or glove compartment. This ensures that you can quickly grab it whenever needed. By keeping it within easy reach, you’ll be prepared for any minor injuries or medical emergencies that may arise during your travels.
To ensure easy accessibility, start by packing your first aid kit in a compact and durable bag. Choose a bag that fits well in your carry-on or glove compartment, and that has compartments or pockets to keep the contents organized. Once you have your kit ready, place it in a location that is easily reachable, avoiding any clutter or obstructions.
If you are traveling by car, consider storing the kit in the glove compartment, where it will be secure and easily accessible. If you are flying, make sure the kit is packed in your carry-on bag, as checked luggage may not always be accessible during the flight.
Remember, when it comes to first aid, time is of the essence. By keeping your travel first aid kit easily accessible, you can respond quickly to any medical situations that may arise and ensure the well-being of yourself and your travel companions.
Wrap it up with confidence!
In conclusion, packing a travel first aid kit is an essential step in ensuring a safe and prepared journey. By following the guide we’ve provided, you can create a well-stocked and organized kit that will come to your aid in times of need. Remember to include items like bandages, medications, and basic medical supplies, and don’t forget to tailor the kit to your specific needs and destination. With a well-prepared first aid kit by your side, you can travel with confidence, knowing that you are equipped to handle any minor injuries or health issues that may arise along the way. Happy travels and stay safe!


Can you recommend specific brands or types of containers that are suitable for a travel first aid kit? I want to make sure I choose one that is durable and easy to carry.
I have a question about step 5. What kind of personal medical information should be included in the travel first aid kit? Is it just basic details like name and emergency contact, or should I include more information?
Step 5 is indeed an important aspect of preparing a travel first aid kit. In addition to your name and emergency contact information, it’s also recommended to include any relevant medical conditions or allergies that you have, as well as a copy of your health insurance information. This can be helpful for medical professionals in case of an emergency. However, please remember to only include information that you are comfortable sharing. Let me know if you have any further questions!
It would be great if you could suggest some related topics to this guide. Are there any other travel-related health and safety topics that you could cover in future guides?
I followed the guide but I’m having trouble organizing the supplies by category. It’s hard to decide what goes where. Any tips on how to categorize the items effectively?
I understand that organizing the supplies by category can be challenging. One effective way to categorize the items is by grouping them based on their purpose. For example, you can have a category for wound care supplies, another for medications, and another for personal protective equipment. You can also consider using small pouches or zip-lock bags to keep similar items together within each category. Feel free to let me know if you have any more specific questions!