

In this step-by-step guide, we will walk you through the process of packing a mini travel sewing kit for your next trip. Having a compact sewing kit can be incredibly useful for quick fixes and emergencies, no matter if you’re a skilled seamstress or just need a few basic tools. So, let’s get started!
Stitch in Style on the Go


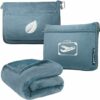
Choose a suitable container
To choose a suitable container for your sewing supplies, follow these steps:
- Select a small, durable container that is lightweight and compact.
- Look for a sturdy plastic or metal container with a secure lid to protect your supplies during travel.
- Make sure the container is big enough to hold all your sewing essentials but still small enough to be easily carried.
- Consider compartments or dividers inside the container to help organize your supplies and prevent them from getting tangled.
- Ensure that the container is easy to open and close, allowing quick access to your sewing tools whenever needed.
- Finally, opt for a container that fits your personal style and preferences, as it will make your sewing experience more enjoyable.
By following these guidelines, you can choose a suitable container that will keep your sewing supplies safe and organized while on the go.


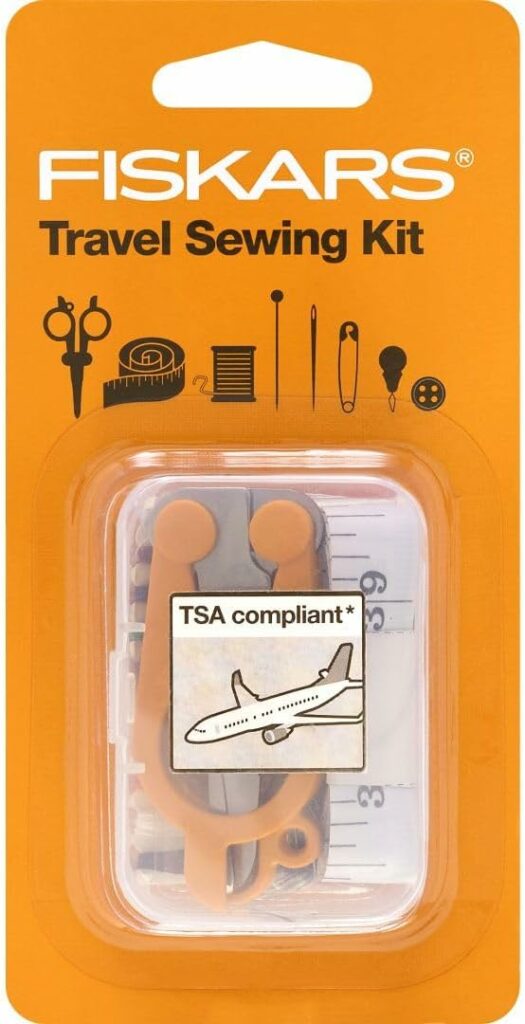
Gather essential sewing tools
To create your travel sewing kit, start by collecting the essential tools. Grab a pair of small scissors for cutting fabric and thread, and make sure to have needles of various sizes for different sewing tasks. Don’t forget to include thread in basic colors that match your fabric, safety pins for temporary fixes, a thimble to protect your finger, and a small seam ripper for undoing stitches. Organize these tools neatly in a compact container for easy portability.
Organize your threads
To organize your sewing threads, start by sorting them by color. Wind each thread around a small plastic bobbin, making sure to secure the end. This way, you can easily find the color you need without having to search through a tangled mess of threads. Happy sewing!
Secure the needles
To secure your needles and prevent them from getting lost or causing accidents, follow these steps:
- Find a small container or needle case to store your needles. This will keep them organized and easily accessible.
- Alternatively, you can use a piece of felt or a mini pincushion to secure your needles. Simply stick the needles into the felt or pincushion, making sure they are held firmly in place.
- Keep your needle container or felt/pincushion in a safe and convenient location, such as a sewing box or drawer.
- Whenever you finish using a needle, immediately place it back into the container or secure it in the felt/pincushion. This will help prevent accidental needle pricks and keep your needles from getting misplaced.
- Regularly check your needle storage to ensure all needles are accounted for and properly secured.
By following these steps, you can easily secure your needles and ensure a safe and organized sewing experience.
Include a small tape measure
Add a small retractable tape measure to your sewing kit. This handy tool will be invaluable when you need to quickly measure fabric or other materials while on the go. Simply pull out the tape measure, extend it to the desired length, and take your measurements with ease.
Pack small fabric swatches
To pack small fabric swatches, follow these simple steps:
- Choose a few small fabric swatches in different colors and textures. For example, you might include a piece of cotton, silk, and denim fabric.
- Fold each swatch neatly and place them in a small plastic bag or a fabric pouch. This will keep them protected and prevent them from getting wrinkled or dirty.
- Pack the fabric swatches in a convenient spot in your bag, such as a side pocket or a separate compartment. This will make them easily accessible when you need them.
- Make sure to label the bag or pouch with a description of the fabrics included. This will help you quickly identify the swatches you need for repairs or stitching tests.
By packing small fabric swatches, you’ll have a handy tool for emergency repairs and a way to test out stitches before applying them to your garment. Happy sewing!
Consider including a small sewing guide
If you’re a beginner or need a refresher, consider including a small sewing guide or instruction booklet in your kit. Here’s how you can create one:
- Gather essential sewing information: Include basic stitches, sewing terminology, and tips for choosing the right fabric and thread.
- Add step-by-step instructions: Break down common sewing techniques, such as hemming, attaching buttons, and sewing seams. Use clear illustrations or diagrams to make it easier to follow along.
- Include troubleshooting tips: Anticipate common sewing problems and provide solutions. Cover issues like thread tension, needle breakage, or fabric puckering.
- Organize the guide: Use bullet points or headings to divide the information into sections. This will help users quickly find the guidance they need.
Remember, the purpose of the sewing guide is to provide users with a quick reference while they’re on the go. Keep the instructions concise and easy to understand. Happy sewing!
Secure everything in the container
Secure everything in the container by organizing your sewing kit items. Use dividers, small zippered bags, or elastic bands to keep everything in place and prevent shifting during travel. This ensures that your sewing supplies remain securely stored and easily accessible when you need them.
Add the sewing kit to your travel essentials
To add the sewing kit to your travel essentials, start by gathering all the necessary items: a small sewing kit, needles, thread in various colors, small scissors, safety pins, and buttons. Place these items in a compact case or pouch that is easy to carry. Then, make sure to pack the sewing kit in a convenient location within your luggage or bag, ensuring it is easily accessible whenever you may need it during your travels.
Wrap it up!
In conclusion, packing a mini travel sewing kit doesn’t have to be a daunting task. By carefully choosing the essentials and organizing them effectively, you can ensure that you are prepared for any unexpected wardrobe mishaps during your trip. So, don’t forget to include a few basic supplies like needles, thread, scissors, and safety pins. With your compact sewing kit in hand, you’ll be ready to tackle any garment emergencies that may come your way. Safe travels and happy sewing!
Essential Supplies


Smart Sewing Solutions
Step-by-Step Guide to Using Your Mini Travel Sewing Kit
- Familiarize yourself with the contents: Start by opening the kit and taking a look at its contents. You will typically find items like needles, thread, scissors, buttons, and a small measuring tape. Make sure you understand how each item works
- Thread the needle: Take a thread from the kit and pass it through the eye of the needle. Beginners may find it easier to wet the end of the thread or use a needle threader to assist in threading the needle
- Mend small tears or loose buttons: Use the needles and thread provided to mend any small clothing tears or replace loose buttons. Sew along the tear or buttonhole, making small, even stitches to secure the fabric
- Practice basic stitches: To improve your sewing skills, practice basic stitches such as a running stitch, backstitch, or whip stitch. These stitches can be used to mend tears or sew fabric together
- Store your kit properly: After you finish using your mini travel sewing kit, make sure to neatly put everything back in its place. This will help you stay organized and ensure that all the items are ready for your next sewing project
- Remember, practice makes perfect! Don’t be discouraged if your stitches aren’t perfect at first. With time and practice, you’ll become more skilled and confident in using your mini travel sewing kit
Everything you need to know about our Mini Travel Sewing Kit
What is a mini travel sewing kit?
A mini travel sewing kit is a compact and portable set of essential sewing tools that are designed to be convenient for traveling. It typically includes items such as small scissors, needles, thread, buttons, and safety pins. These kits are perfect for fixing minor clothing mishaps or making quick repairs on the go. They are lightweight and compact, making them easy to fit in your luggage, backpack, or purse. A mini travel sewing kit is a handy and practical item to have when you’re away from home and need to quickly mend a rip, replace a button, or hem a garment.
What are the essential items included in a mini travel sewing kit?
A mini travel sewing kit typically includes a compact set of essential items that can come in handy for basic sewing repairs while on the go. Here are the key items you can expect to find in such a kit:
- Needles: Assorted sizes and types of needles, including regular sewing needles and possibly some specialized needles like a curved needle or a tapestry needle for specific sewing tasks.
- Thread: A selection of thread colors, usually in small spools or bobbins, to match different fabric types and colors. Common colors like black, white, and beige are often included.
- Scissors: Small, sharp scissors or mini thread snips that can easily fit in the kit. These are essential for cutting threads or fabric during sewing repairs.
- Pins and Safety Pins: Straight pins for holding fabric in place during sewing, and safety pins that can be used for temporary fixes or securing items.
- Buttons: A few different sizes and colors of buttons, since lost or damaged buttons can be a common issue while traveling.
- Thimble: A small thimble can protect your finger while hand sewing.
- Measuring Tape: A small retractable measuring tape, useful for taking quick measurements or ensuring accurate repairs.
- Needle Threader: A handy tool that helps thread the needle, especially for those with impaired vision or difficulty threading needles.
- Seam Ripper: A small tool with a sharp blade used for removing stitches or opening seams.
- Small Case or Pouch: All these items are typically packed in a compact, portable case or pouch, making it easy to carry and store.
I followed this guide on my recent trip and it saved me so much stress. I was able to mend a tear in my pants and fix a loose button. Highly recommend!
I adapted this guide by including a small magnifying glass in my sewing kit. It’s been helpful for threading needles and working with tiny stitches.
I added a couple of safety pins to my sewing kit. They’ve come in handy in emergency situations when I needed a quick fix. Highly recommend!
I have a question about step 3. How do you suggest organizing threads? Should I wind them around small cards or use thread organizers?
Would it be a good idea to include a small pair of pliers in the kit? Sometimes I need them to pull out stubborn needles.
I found that including a small pair of scissors in the kit is essential. It makes cutting threads so much easier!
This guide is so helpful! I’ve always struggled with packing my sewing kit for trips. Now I know exactly how to organize everything and keep it secure. Thanks!
Do you have any recommendations for a good container to use? I’m looking for something compact and durable.