

The guide provides clear instructions on how to maintain and restock your travel-sized sewing kit. It emphasizes the importance of having a well-stocked kit for any travel adventure, regardless of your level of sewing experience. By following the step-by-step instructions, you’ll be able to keep your sewing kit organized, ensure that it’s always ready for use, and replace any depleted supplies.
Compact Essentials for On-the-Go Sewing


Essential Travel Sewing Kits for Every Level of Expertise
Assess Your Sewing Kit
To assess your sewing kit, start by emptying its contents onto a clean surface. Carefully examine each item and discard anything that is damaged, expired, or no longer useful. This will give you a clear idea of what needs to be restocked, allowing you to create a comprehensive shopping list for your sewing needs.

![LEONIS 30 Color Handy Polyester Sewing Threads 45 m / 50 yds Each [ 93011 ]](https://m.media-amazon.com/images/W/MEDIAX_792452-T1/images/I/51ip7IQ5KpL._AC_SL1000_.jpg)
Make a List
To create a comprehensive list for your travel-sized sewing kit, start by gathering all the essential items you’ll need. Include needles, thread, scissors, pins, buttons, and a small measuring tape. Make sure to note down the quantity of each item you currently have in your kit, so you know what needs restocking.
Gather Supplies
To gather all the necessary supplies, start by checking your local craft or sewing store. You can also search online for the items you need. Be sure to choose travel-sized options that will fit in your kit. Remember to make a list before you begin, so you can stay organized and ensure you have everything you need.
Organize Your Kit
To organize your sewing kit, start by gathering small containers or compartments that you can use to separate different types of items. For example, you could use small plastic containers with lids or even repurpose old pill containers. Label each container or compartment with the specific item it will hold, such as needles, thread, snaps, buttons, and so on. Arrange these containers or compartments in your sewing kit in a way that makes sense to you, ensuring easy access to each item. By doing this, you’ll have a well-organized sewing kit that makes it a breeze to find what you need, whether you’re at home or on the go.
Restock Needles and Thread
To replace used or damaged needles, follow these steps:
- Remove the old needle from your sewing machine by loosening the screw or lever that holds it in place.
- Insert a new needle into the machine, making sure it is properly aligned with the flat side facing the back.
- Tighten the screw or lever to secure the needle.To restock your thread supply, consider these tips:
- Assess the colors you currently have and identify any gaps in your collection.
- Purchase a variety of thread colors that will cover a wide range of sewing projects.
- Organize your new threads in a way that makes it easy to locate and access them when needed. This could be by color, brand, or any other system that works for you.By following these simple steps, you can ensure that you are well-prepared with fresh needles and a diverse thread supply for all your future sewing endeavors.
Add Essential Tools
To add essential tools to your kit, start by including scissors, pins, and a measuring tape. These tools are crucial for various tasks and can come in handy in many situations. Opt for compact and travel-friendly options to ensure they don’t take up too much space in your kit. Having these tools readily available will make your work easier and more efficient.
Include Spare Buttons and Zippers
To ensure you’re prepared for any wardrobe mishaps, make sure to include spare buttons and zippers in your sewing kit. Here’s what you need to do:
- Purchase a variety of buttons in different sizes and colors, so you have options that match your garments.
- Choose zippers that are compatible with the types of clothing you frequently wear, such as invisible zippers for dresses or regular zippers for pants.
- Store the buttons and zippers in small, labeled containers or bags to keep them organized and prevent them from getting lost.
- Whenever you’re sewing or repairing a garment, check if any buttons or zippers need to be replaced and use the spare ones from your kit.
By having spare buttons and zippers on hand, you’ll be able to quickly fix any wardrobe malfunctions and keep your outfits looking flawless.
Consider Small Fabric Swatches
Add Small Fabric Swatches:
- Collect fabric scraps: Cut small pieces of fabric from old clothes or unused materials in a variety of colors and textures.
- Label the swatches: Use a permanent marker or attach small tags to each swatch to easily identify them later.
- Store them in your kit: Keep the fabric swatches in a small ziplock bag or an envelope to protect them from damage and keep them organized.
- Use for color matching: When shopping for new fabric or accessories, compare the swatches to ensure a good color match with your existing items.
- Make small repairs: If you encounter a tear or a stain on a garment, use the swatches as patches or to test different cleaning methods before applying them to the actual fabric.
- Share with others: Keep a few extra swatches to loan or give to friends or family who may find them helpful for their own projects.Remember, having a variety of small fabric swatches in your kit can be a practical and handy resource for color matching and minor repairs.
Secure Everything in Place
To secure everything in your sewing kit, start by using elastic bands, small bags, or dividers. Wrap the elastic bands around spools of thread and other small items to keep them in place. Place loose items, such as needles and buttons, in small bags and seal them tightly. Finally, use dividers to separate and organize different types of sewing supplies. By following these steps, you can prevent items from shifting or getting tangled while you’re traveling.
Regularly Check and Restock
- Check your sewing kit: Make it a habit to inspect your travel-sized sewing kit regularly. Examine the contents to ensure that all the essential items, such as needles, thread, and scissors, are clean, in good condition, and not running low.
- Restock as needed: If you find any items missing or running low during your inspection, promptly restock them. Make a list of the supplies you need to purchase or replace, and gather them together so that you’re always prepared for any sewing emergencies that may arise during your trips.
Remember, regular checking and restocking of your travel-sized sewing kit will help you stay well-prepared and ready to handle any sewing mishaps while on the go. Happy sewing!
Wrapping it Up!
In conclusion, maintaining and restocking your travel-sized sewing kit is a simple task that can greatly benefit you on your travels. By ensuring you have all the necessary supplies and keeping your kit organized, you’ll be able to tackle any sewing emergencies that may arise. So go ahead and get your kit in order, and enjoy your travels with the peace of mind that you’re prepared for any sewing mishaps that may come your way. Safe travels and happy sewing!
Essential Supplies


Efficient Sewing Solutions
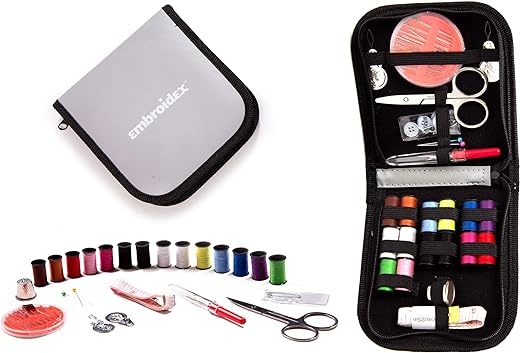
Step-by-step guide to using your travel-sized sewing kit
- Start by familiarizing yourself with the contents of the travel-sized sewing kit. Take out each item and understand its purpose and function
- Identify the type of repairs you would like to make. Whether it’s fixing a loose button, mending a small tear, or hemming a garment, having a specific task in mind will help you focus
- Choose the appropriate thread color for your repair. Use the included thread samples or select a color that matches the item you are repairing as closely as possible
- Thread the needle carefully. If you’re finding it difficult, you can flatten the thread between your fingers or use a bit of saliva to moisten the end and make it easier to thread
- Practice a few basic stitches on scrap fabric before attempting to repair your item. This will help you gain confidence and improve your technique
- When repairing, make sure to secure the thread by tying a knot at the end. This will prevent it from unraveling
- Use small, even stitches to mend tears or attach buttons. Take your time and ensure that your stitches are tight enough to hold but not so tight that they cause puckering
- If you need to hem a garment, measure and mark the desired length before sewing. Fold the fabric under and sew using a small, neat stitch to create an invisible hem
- Once you have completed your repair, trim any excess thread and give it a gentle press with a warm iron to ensure a polished finish
- Lastly, remember that practice makes perfect. The more you use your travel-sized sewing kit and practice different repairs, the more skilled you will become
Do you have any advanced tips for maintaining a travel-sized sewing kit? I feel like I’ve already covered the basics and would love to take it to the next level.
Absolutely! One advanced tip is to invest in a small needle threader. It can be really helpful when working with small needles. Another tip is to consider including a small pair of scissors with a protective cover to ensure they stay sharp and safe.
After following this guide, I was able to confidently repair a tear in my favorite travel pants during my trip. It saved me from having to buy a new pair. Thank you for the helpful guide!
You’re welcome! We’re thrilled to hear that the guide helped you repair your pants and saved you from unnecessary expenses. Thank you for sharing your success story!
This guide is great, but I would love to see a follow-up article on how to make your own travel-sized sewing kit from scratch. It would be interesting to learn how to choose the right materials and tools.
Thank you for the suggestion! We’ll definitely consider creating a follow-up article on how to make a DIY travel-sized sewing kit. Stay tuned!
I always carry a mini sewing machine in my travel-sized sewing kit. It’s been a lifesaver in emergency situations when I needed to quickly fix a seam. Highly recommend!
That’s a fantastic suggestion! Including a mini sewing machine in your travel-sized sewing kit can definitely be a game-changer, especially for more complex repairs. Thank you for sharing your tip!
I have a different approach when it comes to organizing my sewing kit. Instead of using a traditional box, I use a hanging organizer with clear pockets. It’s easier to see everything at once and saves space. Just wanted to share my variation!
Thank you for sharing your variation! Using a hanging organizer with clear pockets sounds like a smart and space-saving solution. Different approaches work for different people, so it’s great to have alternatives.
Thank you for sharing your success story! We’re glad to hear that the guide helped you organize and restock your sewing kit.
This guide is great, but I’m wondering if you have any specific recommendations for needle brands and thread types. I’m always looking for high-quality supplies.
Great question! When it comes to needles, brands like Schmetz and Clover are highly recommended. As for thread, popular brands like Gutermann and Coats & Clark offer a wide range of options in terms of durability and color selection.
I adapted the steps in this guide to create a travel-sized knitting kit instead. It was really helpful to have a checklist and organize the supplies. Thank you!
That’s a great idea! Adapting the steps to create a knitting kit is a clever way to utilize the guide. We’re glad it was helpful for you!
I followed this guide and it was really helpful! My travel-sized sewing kit was a mess before, but after following the steps, it’s now organized and well-stocked. I even added some extra tools that I found useful. Thank you!