Welcome to our step-by-step guide on how to clean ANC headphones! If you’re a fan of that immersive audio experience, you probably own a pair of Active Noise Cancelling (ANC) headphones. These nifty gadgets are designed to block out unwanted noise, allowing you to enjoy your music or podcasts in peace.
Now, as much as we love our ANC headphones, they can get a little dirty over time. And let’s face it, no one wants to stick something grimy in their ears, right? That’s where this guide comes in handy. We’ll walk you through the process of cleaning your ANC headphones, so you can keep them in tip-top shape and enjoy your audio in all its crystal-clear glory.
But before we dive into the cleaning process, here’s a crazy fact to shock you: did you know that on average, our headphones carry more bacteria than a kitchen cutting board? Yikes! That’s why it’s important to give them a good clean every now and then.
So, grab a cloth, gather your supplies, and let’s get started on giving your ANC headphones the TLC they deserve.
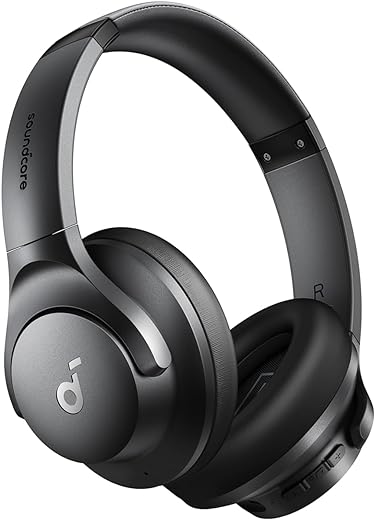
Top-Rated ANC Headphones


Gather cleaning supplies
To gather your cleaning supplies, follow these easy steps:
- Collect a soft cloth: This will be used to gently wipe and clean surfaces without scratching or damaging them.
- Get mild soap or detergent: Look for a gentle cleaning product that won’t be too harsh on the items you’re cleaning.
- Prepare warm water: Fill a small basin or bowl with warm water to use for diluting the soap and rinsing.
- Grab cotton swabs: These are perfect for reaching small and delicate areas that need precise cleaning.
- Get a small brush: A soft-bristled brush will come in handy for removing any dirt or debris from hard-to-reach crevices.
Having these essential cleaning supplies ready will make your cleaning tasks efficient and effective.


Remove ear pads
Detach the ear pads from the headphones carefully, following the manufacturer’s instructions. Gently pull or twist the ear pads to remove them from the headphones. Take your time and be cautious not to apply excessive force to avoid damaging the ear pads or the headphones.
Clean ear pads
To clean the ear pads, start by dampening a cloth with a mixture of warm water and mild soap. Gently wipe the ear pads with the damp cloth, making sure to remove any dirt and oils. It’s important to avoid excessive moisture, as this can damage the ear pads. For example, you can wring out the cloth well before wiping the ear pads to ensure you’re not introducing too much water. Remember to be gentle when wiping to avoid causing any damage to the pads.
Clean headband
To clean the headband, first, take a clean cloth and gently wipe the entire surface, making sure to focus on any stains or dirt. If you encounter stubborn stains, grab a mild detergent and a soft brush. Apply a small amount of the detergent to the brush and carefully scrub the affected areas. Rinse the headband thoroughly with water and pat dry with a clean cloth.
Clean ear cups
To clean the ear cups, first dampen a cloth or cotton swab with the soap mixture. Next, gently wipe the ear cups with the cloth, making sure to avoid the speaker drivers. For example, you can start by dipping a cotton swab in the soapy water, then carefully wipe the surface of the ear cups in a circular motion. This will help remove any dirt or grime without damaging the speakers.
Dry thoroughly
To ensure the best results, it is important to allow all the components of the headphones to air dry completely. After cleaning, set aside the different parts in a well-ventilated area and let them dry naturally. Avoid rushing the process and resist the temptation to reassemble the headphones until each part is completely dry.
Reattach ear pads
To reattach the ear pads securely, begin by carefully removing any residue or debris from the headphone’s ear cups. Next, locate the small hooks or clips on the back of the ear pads and match them with the corresponding slots or holes on the ear cups. Gently press the ear pads into place, making sure they are aligned properly. Finally, apply a firm but gentle pressure around the edges of the ear pads to ensure a secure fit.
Test functionality
To test the functionality of the headphones, start by checking all the buttons, controls, and ANC features. Press each button and verify that it responds correctly. Adjust the volume, switch between different modes, and ensure that the active noise cancellation feature is working as intended. This step will help you ensure that all the essential functions of the headphones are in proper working order before you start using them.
Regular maintenance
- Wipe your ANC headphones regularly with a soft cloth to keep them clean.
- Avoid using harsh chemicals when cleaning your headphones.
- Use a gentle cleaning solution if needed, but make sure it is safe for your headphones.
- Be sure to clean both the ear cups and the headband.
- Pay attention to any specific cleaning instructions provided by the manufacturer.
- Regularly clean the charging port and any other ports or buttons on your headphones.
- Store your ANC headphones in a clean and dry place when not in use.
Final Thoughts
In conclusion, regular cleaning is essential for maintaining the optimal performance and longevity of your ANC headphones. By following the step-by-step guide provided in this blog post, you can ensure that your headphones remain free from dirt, grime, and earwax buildup. Remember to clean the earpads, vents, and any other visible areas carefully, using appropriate cleaning solutions and tools. By incorporating this simple cleaning routine into your headphone maintenance, you can enjoy clear, immersive sound and extend the lifespan of your ANC headphones. Happy cleaning!
Essential Supplies

Maximizing Sound Quality
Getting the most out of your ANC headphones
- Start by charging your ANC (Active Noise Cancelling) headphones fully before use
- Turn on the ANC feature on your headphones. This can usually be done by flipping a switch or pressing a button labeled “ANC” or “Noise Cancelling
- Connect your ANC headphones to your audio source (e.g., smartphone, tablet, computer) using the provided cable or via Bluetooth pairing
- Adjust the volume level on both your audio source and the headphones to a comfortable level
- Place the headphones over your ears, making sure they fit snugly for optimal noise cancellation
- Enjoy the immersive audio experience with reduced background noise, allowing you to focus on your music or audio content
Frequently Asked Questions about ANC Headphones
What is the price range for ANC headphones, and do more expensive models offer better performance?
The price range for active noise-canceling (ANC) headphones can vary quite a bit depending on the brand, features, and overall quality. In general, you can find ANC headphones starting from around $50 and going up to several hundred dollars.
When it comes to the performance of ANC headphones, it’s not always true that more expensive models offer better performance. While higher-end headphones may provide more advanced ANC technology and superior sound quality, there are also some affordable options that offer excellent noise cancellation and decent sound performance.
Factors such as the type of ANC technology used, the number of microphones, and the overall build and design of the headphones can significantly affect their performance. It’s important to read reviews and compare different models to find the best ANC headphones within your budget.
Remember that individual preferences also play a role in determining the “better” performance. Some people may prioritize noise cancellation over sound quality, while others may focus more on audio fidelity. It’s always a good idea to test headphones if possible or rely on trusted reviews to make an informed decision based on your personal preferences and budget.
How long does the battery of ANC headphones typically last?
The battery life of active noise-canceling (ANC) headphones can vary depending on the specific model and usage. On average, ANC headphones can last anywhere from 15 to 40 hours on a single charge. However, it’s important to note that this estimate is based on typical usage, such as listening to music or watching videos. The actual battery life may be affected by factors like volume level, ANC intensity, and connectivity options. It’s always a good idea to consult the manufacturer’s specifications for the specific ANC headphones you’re interested in to get accurate information on battery life.
Are ANC headphones only useful in noisy environments?
ANC (Active Noise Cancellation) headphones are primarily designed to reduce the level of external noise that reaches your ears. They achieve this by using microphones to pick up ambient sounds and then generating sound waves that cancel out those noises.
While ANC headphones excel in noisy environments, they can still be useful in quieter settings as well. In addition to blocking out external noise, they can also enhance the listening experience by allowing you to focus on your audio content without any distractions. This is particularly beneficial when you want to fully immerse yourself in music, movies, or podcasts.
Even in quieter environments, there can still be background noises such as air conditioning units, humming appliances, or the sound of traffic outside. ANC headphones can effectively reduce these unwanted sounds, allowing you to enjoy your audio content with greater clarity.
Furthermore, ANC headphones can be helpful during travel, whether you’re on a plane, train, or bus. They can significantly reduce the rumble of engines and minimize the ambient noise typically encountered during travel, making your journey more comfortable and enjoyable.
In summary, while ANC headphones are especially effective in noisy environments, they can still provide benefits and enhance your listening experience in quieter settings by reducing background noise and allowing you to fully focus on your audio content.
I followed this guide and my ANC headphones look and sound amazing after cleaning! It’s like having a brand new pair. Thank you for the detailed steps and instructions!
I’m thrilled to hear about your success! It’s always satisfying when your headphones look and sound like new after a good cleaning. Thank you for sharing your positive experience and for following the guide. Enjoy your refreshed ANC headphones!
I’ve been using a small handheld vacuum cleaner to remove any dust or debris from the ear cups before cleaning them. It’s quick and efficient. Just thought I’d share this tip!
That’s a fantastic tip! Using a handheld vacuum cleaner to remove dust and debris from the ear cups is a great idea to ensure a thorough cleaning. Thanks for sharing!
Could you please include some tips for cleaning the cables? I find that they often get dirty and sticky. It would be helpful to know the best way to clean and maintain them.
Thank you for suggesting this topic! Cleaning and maintaining cables is indeed an important aspect of headphone care. I’ll make sure to include tips on cleaning and maintaining cables in future articles. Stay tuned!
I found that using a cotton swab dipped in rubbing alcohol is really effective for cleaning the headband. It helps to remove any oils or sweat residue. Just be careful not to get any alcohol on the ear pads!
Thanks for sharing your variation! Using a cotton swab with rubbing alcohol is indeed a great way to clean the headband. It’s important to be cautious and avoid getting alcohol on the ear pads to prevent any damage.
Great question! To clean the ear pads, you can use a damp cloth with mild soap or a cleaning solution specifically designed for headphones. Just make sure not to soak the pads, and gently wipe them to remove any dirt or stains.
I have a question about step 3. What is the best way to clean the ear pads? Can I use a damp cloth or should I use a specific cleaning solution?