


In this step-by-step guide, we will help you learn how to clean your portable clothes steamer with ease and efficiency. We understand that keeping your steamer in top-notch condition is crucial for achieving wrinkle-free clothes and maintaining its longevity. So, whether you’re a seasoned steamer or new to the game, we’ve got you covered with simple and practical instructions. By following our guide, you’ll have your portable clothes steamer looking and performing like new in no time. Let’s dive in and get your steamer sparkling clean!
Top Picks for Wrinkle-Free Fabrics


The Ultimate Guide to Cleaning Your Garment Steamer for Maximum Performance!
Gather necessary materials
To gather the necessary materials for this task, you will need the following items:
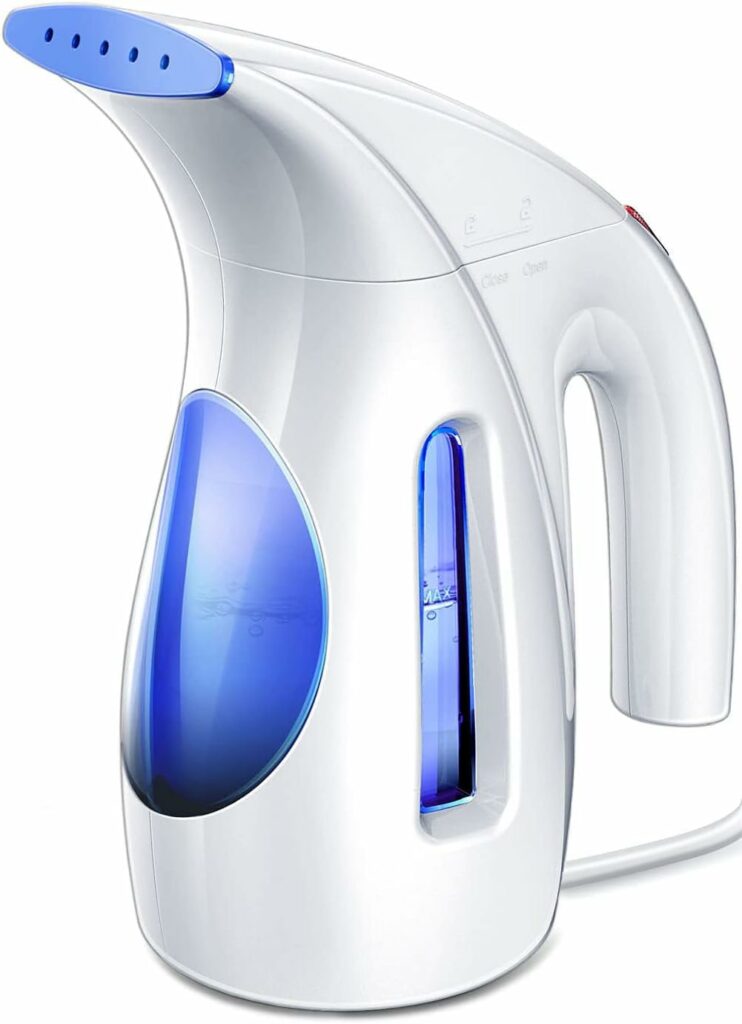
- Portable clothes steamer: This will be your main tool for removing wrinkles from clothes. Make sure it is in good working condition and filled with water.
- Clean water: Fill the reservoir of the clothes steamer with clean water. This will provide the necessary steam to effectively remove wrinkles.
- Vinegar: Mix a small amount of vinegar with the water in the steamer. Vinegar helps in removing odors and sanitizing the clothes. It also helps to prevent mineral buildup in the steamer.
- Clean cloth or sponge: You will need a clean cloth or sponge to wipe away any excess moisture or residue from the steamer or the clothes.
- Small brush: A small brush, such as a toothbrush, can be used to gently scrub away any stubborn stains or dirt from the clothes.
Make sure you have all these materials ready before you begin steaming your clothes. This will ensure a smooth and efficient process. Happy steaming!


Prepare the steamer
To prepare the steamer, start by ensuring that it is unplugged and cool. This step is crucial for your safety and to avoid any electrical mishaps. Next, empty any remaining water from the tank. Carefully pour out the water into a sink or drain, using caution not to spill it on yourself or the surrounding area. If your steamer has detachable parts, remove them by following the manufacturer’s instructions. For example, some steamers have a water tank that can be easily removed for cleaning or refilling. Detaching these parts will make it easier to clean and maintain your steamer properly.
Remember, always prioritize safety when handling electrical appliances. Unplugging the steamer and allowing it to cool down will prevent accidental electrocution or burns. Emptying the water tank is essential to avoid any water leakage or damage while handling the steamer. Lastly, removing detachable parts, such as the water tank, will facilitate proper cleaning and maintenance. By following these simple steps, you will be well on your way to efficiently using your steamer and extending its lifespan.
Clean the exterior
To clean the exterior of your steamer, start by dampening a cloth or sponge with water. Gently wipe the entire surface of the steamer, making sure to remove any dirt or grime that may have accumulated. Be cautious not to get water into the electrical components, as this could cause damage.
Descale the tank
To descale the tank, start by mixing equal parts of water and vinegar in the tank. Make sure to use the appropriate measurements to achieve the right balance. Once the mixture is ready, allow it to sit for approximately 15 minutes. This will give the vinegar enough time to dissolve any mineral buildup that may have accumulated in the tank.
After the 15 minutes have passed, it’s time to rinse the tank thoroughly with clean water. This step is crucial to remove any residue left behind by the vinegar solution. Take your time to ensure that all areas of the tank are rinsed properly.
Remember, maintaining a clean and descaled tank is important for the optimal performance and longevity of your equipment. By following these simple steps, you can easily descale your tank and keep it in top condition.
Clean the nozzle
To clean the nozzle of your steamer, start by using a small brush or toothbrush to carefully remove any residue. Gently brush the nozzle, making sure to reach all areas where buildup may occur. This will help to clear any blockages and ensure optimal performance. Remember to be gentle while doing this to avoid causing any damage to the steamer. By regularly cleaning the nozzle in this way, you can keep your steamer in top condition and enjoy its benefits for a long time.
Reassemble the steamer
To reassemble the steamer, first, ensure that all the parts are thoroughly dry. Then, reattach any detachable parts, such as the water tank, hose, or nozzle. Make sure they fit securely and are tightly fastened to avoid any leaks or malfunctions. Double-check all the connections and ensure they are aligned correctly.
Next, it’s time to fill the tank with clean water. Open the tank’s lid or cap, and using a clean jug or bottle, carefully pour water into the tank until it reaches the recommended level indicated by the manufacturer. Avoid overfilling the tank as it may cause spills or damage to the steamer.
Once the tank is filled, securely close the lid or cap to prevent any water from leaking during operation. Ensure that all the parts are firmly attached and the steamer is ready for use. Now you can enjoy the benefits of a fully assembled and ready-to-use steamer.
Test and use
To test and use the steamer, start by plugging it into a power source and allowing it to heat up. Once it has reached the desired temperature, take a small piece of clothing and position it in an accessible area. Now, hold the steamer nozzle a few inches away from the fabric and press the steam button or trigger to release the steam. Move the steamer up and down the small area you’ve chosen to ensure that the steamer is functioning properly. If you notice a steady flow of steam and the fabric becomes wrinkle-free, then your steamer is ready to use.
Wrapping it up
In conclusion, cleaning a portable clothes steamer is a simple yet important task to maintain its efficiency and longevity. By following the steps outlined in this guide, you can keep your steamer in top-notch condition. Remember to regularly descale, remove mineral deposits, clean the water tank, and unclog the steam vents. Additionally, always refer to the manufacturer’s instructions for specific cleaning guidelines. With a clean and well-maintained steamer, you’ll be able to effortlessly steam your clothes and enjoy wrinkle-free attire in no time. Happy steaming!
Essential Equipment


Efficient Steamer Cleaning
Get Wrinkle-Free Clothes in Minutes
- Fill the water tank: Start by unscrewing the water tank cap and filling it with clean water. Be careful not to overfill it, as it can cause leakage
- Turn on the steamer: Find the power button or switch, and turn on the portable clothes steamer. Give it a few moments to heat up and generate steam
- Prepare your clothes: Hang the garment you want to steam on a hanger or use a garment rack. Ensure there is enough space around the item to allow steam to circulate freely
- Steam your clothes: Hold the steamer upright and gently glide it over the fabric, keeping the steamer a few inches away from the garment. Move the steamer in an up-and-down or side-to-side motion, depending on the fabric and the wrinkles you want to remove. For delicate fabrics, hold the steamer slightly further away
- Allow the garment to dry: After steaming, give the clothing item a few minutes to dry before wearing or folding it. This ensures that any moisture from the steam evaporates, and your clothes are ready to go!
- Remember, always follow the manufacturer’s instructions and safety guidelines when using a portable clothes steamer. It’s also a good idea to test the steamer on a small, inconspicuous area of the fabric before steaming the entire garment, especially if you’re using it on delicate or sensitive materials. Happy steaming!
Frequently Asked Questions about Portable Clothes Steamers
Are portable clothes steamers easy to use?
Yes, portable clothes steamers are generally easy to use. They are designed to be lightweight and user-friendly, making them convenient for both beginners and experienced users. Most models come with simple instructions that guide you through the process. To use a portable clothes steamer, you typically fill the water tank, wait for it to heat up, and then direct the steam towards the wrinkles on your clothes. The steamer’s nozzle allows you to easily control the steam and target specific areas. Overall, portable clothes steamers offer a quick and efficient way to remove wrinkles from your garments without the need for an ironing board.
What is the size and weight of a typical portable clothes steamer?
A typical portable clothes steamer generally measures around 6 to 8 inches in length and weighs between 1 to 2 pounds. These compact and lightweight designs make them highly convenient for travel or everyday use. However, it’s important to note that the exact size and weight may vary slightly depending on the brand and model you choose.
Do portable clothes steamers come with different heat settings?
Yes, portable clothes steamers do come with different heat settings. These settings allow you to adjust the temperature of the steam to suit different types of fabrics and garments. Generally, portable clothes steamers offer at least two heat settings – a lower setting for delicate fabrics like silk or chiffon, and a higher setting for heavier fabrics like cotton or linen. Having different heat settings ensures that you can safely and effectively remove wrinkles from various types of clothing without causing any damage.
I followed all the steps carefully, but I’m still having trouble with my portable clothes steamer. It doesn’t produce steam anymore. Could you provide some troubleshooting tips or advice on what might be causing the issue?
We’re sorry to hear that you’re still having trouble with your portable clothes steamer. There could be a few reasons why it’s not producing steam. Please make sure that the water tank is filled properly and that there are no clogs in the nozzle. If the issue persists, it might be a good idea to contact the manufacturer for further assistance.
You’re welcome! We’re glad to hear that the guide was helpful and that your steamer is working perfectly now. If you have any other questions or need further assistance, feel free to ask.
Thank you for this guide! I followed all the steps and my portable clothes steamer is now working perfectly. It was so easy to gather the necessary materials and the instructions were very clear. I’m really happy with the result!
This guide was great! Could you please write a similar guide on how to clean the water reservoir of a steam iron? I have been struggling with it for a while and would love some guidance.
Thank you for your feedback! We’re glad you found the guide helpful. We appreciate your suggestion for a guide on cleaning the water reservoir of a steam iron. We will definitely take that into consideration and try to cover it in a future article.
I found this guide really useful for cleaning not only my portable clothes steamer but also my handheld garment steamer. The steps were easy to follow, and now both of my steamers are in great condition. Thank you!
You’re welcome! We’re thrilled to hear that you found the guide useful for cleaning both your portable clothes steamer and handheld garment steamer. It’s great to know that both of your steamers are in great condition now. If you have any more questions or need further guidance, feel free to reach out to us.