

In this step-by-step guide, we will explore how to use a mini travel coloring book. Mini travel coloring books are perfect for bringing along on your journeys, whether you’re going on a long flight or a road trip. The purpose of this guide is to provide you with easy-to-follow instructions on how to make the most out of your mini travel coloring book, so you can relax, destress, and enjoy some creative time while on the go.
Top Picks for Coloring on the Go!


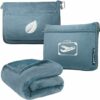
The Adult Coloring Books and Supplies I’m Bringing on My Travels
Gather your supplies
To gather your supplies for using a mini travel coloring book, start by locating the coloring book itself. Next, grab a set of colored pencils or markers to bring your artwork to life. Don’t forget any additional tools you might need, such as a pencil sharpener to keep your pencils in tip-top shape, or an eraser to correct any mistakes. For example, find a coloring book with intricate designs, a set of vibrant colored pencils, and a handheld pencil sharpener for easy on-the-go use.


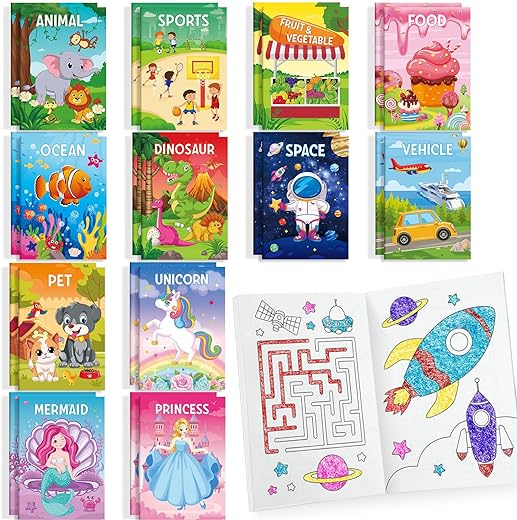
Choose a coloring page
To choose a coloring page, simply open the coloring book and flip through the pages. Take your time to browse the various designs and illustrations. Once you find a page that catches your eye, go ahead and select it as your chosen coloring page. You can choose based on your personal preference or even consider the level of complexity of the design if you want a more challenging coloring experience. Enjoy the process of selecting your coloring page and have fun bringing it to life with colors!
Prepare your coloring tools
Sharpen your colored pencils or markers before starting. Use a pencil sharpener or a knife to carefully sharpen the tips to a fine point. This will ensure that you have precise control over your coloring. Once sharpened, test them on a scrap piece of paper to confirm that they are working smoothly and producing the desired color.
Start coloring
To start coloring, grab your colored pencils or markers and begin adding color to the selected page. Use your tools to fill in the different areas of the design, following the existing lines. Feel free to get creative and add your own patterns and details if you’d like. Let your imagination guide you as you bring the page to life with color!
Take breaks if needed
If you start feeling tired or find that your hand needs a break, take short breaks while coloring. Resting periodically can prevent fatigue and help you enjoy the coloring process for a longer period of time. Just pause, relax your hand, and take a breather before continuing.
Blend and shade
To add depth and dimension to your coloring, try blending colors together. Start by selecting two or more colors that you want to blend. Take a lighter shade and apply it to the area you want to color. Then, take a darker shade and apply it to the edges of the area. Use circular motions to blend the colors together, gradually transitioning from light to dark. This technique creates a smooth and seamless gradient effect.
Another way to create highlights and shadows is by adding lighter and darker shades. Begin by coloring the area with the base color. Then, choose a lighter shade and apply it to the areas where you want to create highlights, such as the top or front of an object. Use a darker shade to add shadows, focusing on the areas that would naturally be in shadow, like the sides or bottom of an object. Remember to blend the colors gently to create a more realistic and balanced look.
For example, if you are coloring a flower, you can use blending techniques to create a soft and natural appearance. Start by selecting two shades of pink, one lighter and one darker. Apply the lighter shade to the petals, focusing on the center and gradually extending outwards. Then, take the darker shade and apply it to the edges of the petals, blending it towards the center. This will give the flower a three-dimensional look and make it appear more realistic.
Similarly, if you are coloring a landscape, you can use shading techniques to add depth. Choose different shades of green for the trees and grass. Apply the lighter shades to the areas that receive more light, such as the tops of the trees or the grassy hills. Use the darker shades to create shadows on the sides or underneath objects, like the trunks of the trees or the valleys in the landscape. By blending and shading, you can create a sense of depth and bring your coloring to life.
Remember, practice makes perfect, so don’t be afraid to experiment with different blending and shading techniques. With time and patience, you’ll become more confident in creating beautiful and realistic coloring creations. Happy coloring!
Stay organized
To keep your coloring tools organized and within reach, gather all your pencils, markers, and other supplies and store them in a small pouch or container. This way, you can easily grab them whenever you’re on the go.
Finish and protect your artwork
To protect your artwork, simply slide it into a clear sheet protector or use a laminating machine. This will safeguard your page from any smudges or tears, ensuring its longevity.
After putting in all the effort and creativity into your artwork, it’s important to take a moment to appreciate the finished result. Admire the colors, textures, and details that you have created. You can choose to keep it for yourself as a special memento of your travels, or share it with loved ones who would appreciate your artistic skills.
- Pause and take a moment to really look at your artwork
- Admire the colors, textures, and details
- Reflect on the time and effort you put into creating it
- Decide whether you want to keep it as a personal keepsake or share it with others
- If you choose to share, consider who would appreciate your creativity the most
- Share it with friends and family members who would cherish your artwork
- Frame it and hang it on your wall as a reminder of your artistic accomplishment
Remember, your artwork is a reflection of your unique perspective and creativity. Take pride in what you have accomplished and don’t be afraid to show it off!
The Final Colorful Thoughts
In conclusion, we have explored the wonderful world of mini travel coloring books and discovered how they can be a perfect companion for your adventures. By following our guide, we have learned about the benefits of these compact coloring books, how to choose the right one, and some creative ideas on how to use them. Whether you are a seasoned traveler or just someone looking for a fun and relaxing activity on the go, a mini travel coloring book can be a great addition to your travel essentials. So next time you embark on a journey, don’t forget to pack one and let your creativity soar as you color your way through your travels! Happy coloring!
Necessary Supplies


Creative Techniques
Getting Creative on the Go
- Start by choosing a comfortable and quiet space where you can relax and focus on coloring
- Flip through the pages of the mini travel coloring book and select a design that catches your eye or resonates with you
- Use colored pencils, markers, or crayons to fill in the different areas of the design. Feel free to experiment with different color combinations and shading techniques
- Take your time and enjoy the process of coloring. It can be a therapeutic and calming activity, so try to be present and fully engaged in the moment
- Once you’ve finished coloring a page, you can either move on to the next one or revisit your previous creations to add more details or touch-ups. Remember, there’s no right or wrong way to color – it’s all about personal expression and enjoyment
Answers to your questions about our Mini Travel Coloring Book
Can the mini travel coloring book be used with crayons as well?
Yes, the mini travel coloring book can absolutely be used with crayons! The pages in the book are typically made of a thick paper that works well with crayons. Just like with colored pencils or markers, crayons can be used to bring the pages to life with vibrant colors. So feel free to grab your favorite crayons and enjoy coloring in your mini travel coloring book!
Is the mini travel coloring book suitable for both kids and adults?
Yes, the mini travel coloring book is suitable for both kids and adults. It is designed with compactness and portability in mind, making it perfect for travel. The intricate designs and patterns in the coloring book offer a creative outlet for adults, while also providing a fun and engaging activity for children. The size of the book may be smaller than regular coloring books, but it still offers a wide range of designs that can be enjoyed by both kids and adults.
Could you suggest some related topics, like how to choose the right coloring tools?
Thank you for your comment! That’s a great suggestion. I’ll definitely consider covering how to choose the right coloring tools in a future article.
I followed the guide, but I’m having trouble blending the colors smoothly. Any advice on how to achieve a better blend?
I’m sorry to hear that you’re having trouble with blending. One tip is to use a blending pencil or a cotton swab to gently blend the colors together. You can also try layering different shades of the same color to create a smoother blend.
This guide is great, but do you have any advanced tips for seasoned colorists?
Thank you for your comment! Advanced colorists can experiment with different coloring techniques like burnishing or using alcohol markers. I can definitely cover these techniques in a future article for more advanced colorists.
I’ve tried using watercolor pencils in my mini travel coloring book and it turned out really nice! It gives a different effect compared to regular colored pencils.
That’s fantastic to hear! Watercolor pencils can indeed create a unique and beautiful effect. Thank you for sharing your experience!
I’ve never used a mini travel coloring book before, but I’m excited to give it a try. Any tips for beginners?
Thank you for your comment! For beginners, I suggest starting with simpler designs and gradually working your way up to more intricate ones. Also, don’t be afraid to experiment with different coloring techniques!
I just finished my first coloring page from my mini travel coloring book and I’m so happy with the result! It’s a great way to relax and unwind while traveling.
I have a question about step 4. Should I start coloring from the center of the page or from the edges?
I’ve been using mini travel coloring books for a while now, and one tip I have is to bring a small pencil sharpener with you for your colored pencils. It’s really helpful when you need a sharp point!
Great guide! I have all my supplies ready and can’t wait to start coloring!